- 通过iPhone 浏览器 下载证书
.mobileprovision - 选择安装
- 连接iPhone 到电脑 并打开iTunes
- 双击ipa 文件
- 点击 install
- 点击Apply
Ad hoc 教程 1 ==> 生成证书
流程参考 苹果开发证书申请
在Devices 加入 测试机 UDID
生成Provisioning Profiles 选择Ad Hoc
在测试机上 安装 生成的Ad Hoc provision 文件
打包ipa时选择ad Hoc
Introduction to CocoaPods
references: raywenderlich
sudo gem install cocoapods

sudo gem update cocoapods
error:
To solve this error
run this command :
sudo xcode-select -switch /Applications/Xcode.app
platform :ios, "7.0"
pod install --verbose --no-repo-update
pod update --verbose --no-repo-update
xcode find and replace with regex
##update July 6, 2015
replace code with Automator
Editing text in Automator
Add shortcut for servicesKeyboard -> Shortcuts -> Services -> The new Service add shortcut
in Xcode many shortcuts not workingcmd+shift+X works well
##2013-10-11
reference stackoverflow
example
search:NSLocalizedString(@"words", nil)
with regex:
(NSLocalizedString\()(@"\w+")(, nil\))
relace regex:
ZXLocalizeble\(\2\)
replace all
result: ZXLocalizeble(@"words")
insert return
press ctrl+q press return
iOS Icon 尺寸
Icon
Icon-Small.png 29*29
Icon-Small@2x.png 58*58
Icon-Small-50.png 50*50
Icon-Small-50@2x.png 100*100
Icon.png 57*57
Icon@2x.png 114*114
Icon-72.png 72*72
Icon-72@2x.png 144*144
new added
Icon-76.png 76*76
Icon-120.png 120*120
Icon-152.png 152*152
iTunesArtwork 512*512
苹果开发证书申请
首先登陆developer.apple.com
点击 certificates开始创建新cer
选择证书类型:开发证书好像只能请一个,第二个是推送的开发证书,production的第一个就是发布证书
然后生成certSigningRequest, 点击keychain 如下图
然后
email 最好输 apple 账号的证书
common name 就是 这个key 的名字
ca email 不填
选saved to disk
click continue
choose File 刚刚生成的 certSigningRequest 点击Generate 如下图
添加APP ID 点击 App IDs
新建
App ID Description 就是Description
选择Wildcard App ID 填 类似com.companyname.*
生成通用app id(pushID 需要选择Explicit App ID)
点击Devices 添加设备,输入名字和UDID即可
最后生成Provisioning Profiles
选择类型
下一步选择 App ID
再下一步选择证书
再下一步选择设备(Distribution 不用这步)
再下一步输入name 最后生成
生成后下载
调试:
双击cer文件
双击provisioning 文件或者直接拖进 xcode organizer
xcode 中的
targets 和 project 选择证书
注意 bundle identifier 要和 App ID 一致
然后选择真机就可以调试了
用apple script写自动开启wallproxy的命令
—2014.10.27—
Automator->Application->Run Shell Script
如下图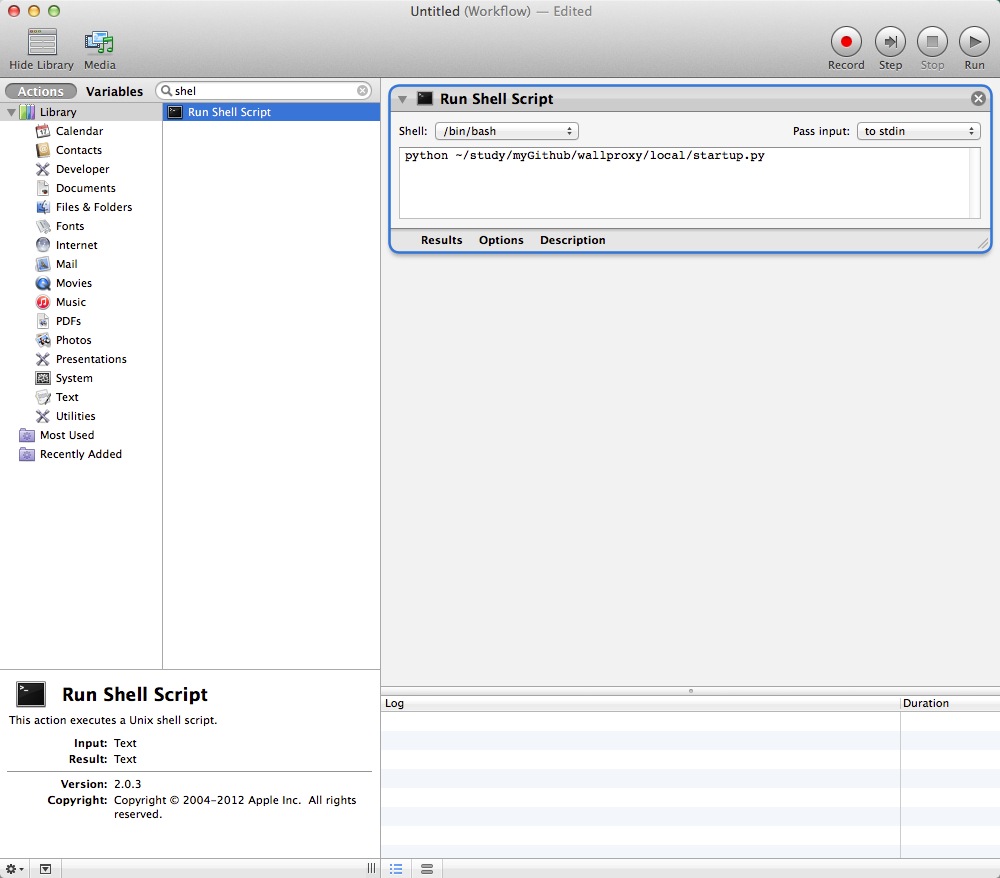
clickcmd+sFile FormatasApplication
如下图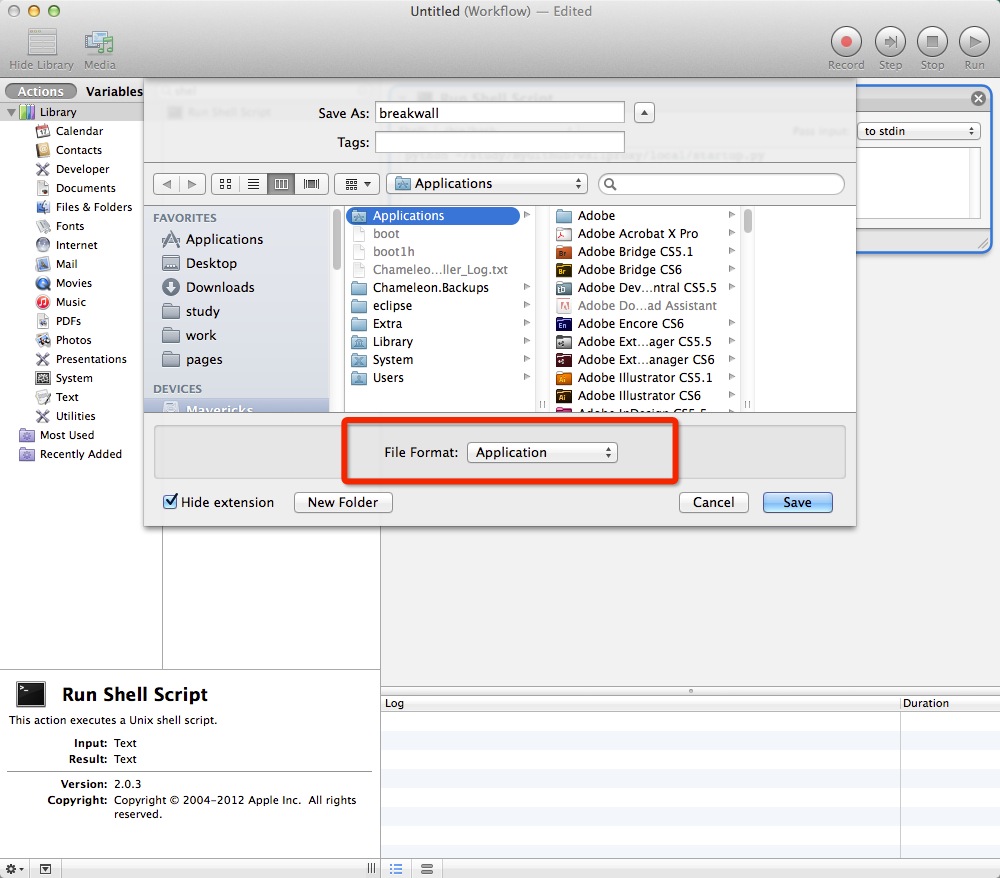
System Preferences->Usres & Groups->Login Items->plus button->select the app you just created
—2013-07-26—
打开 as编辑器
tell the application "Terminal"
do script "python /Users/noteant-3/Documents/    wallproxy-master/local/startup.py"
close the 1st window
end tell
quit
save as app
右键显示包内容可以修改 icon
icon binder 可以简单生成 icon
最后在login items 加入 wallproxy app 就ok了